Costa Rica's Favorite Meal: The Casado
February 7, 2025
Costa Rica is a fabulous destination for luxury travelers, as well as seniors, couples, and families, not least because of its many excellent dining options.…
Read This Post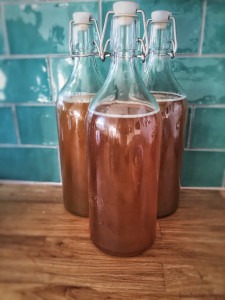 Fermentation is all the rage in foodie circles. From kombucha to kimchi, yogurt to sauerkraut, it may seem like the next new food fad.
Fermented foods have been getting press lately as doctors and dietitians promote it as a path to better gut health. Instead of taking a probiotic pill, why not try naturally fermented foods that you can make at home? It is easy, delicious, and good for you.
But fermented foods are anything but a fad. They go back to ancient times, even to before recorded human history!
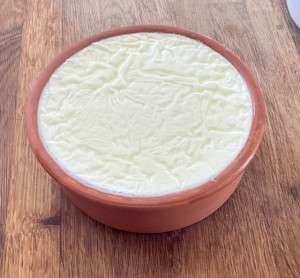 Fermentation occurs when bacteria, yeast, or mold convert sugars and starches in food into other things. Sometimes it is converted into alcohol – hello wine, beer, and spirits! Sometimes it is converted into lactic acid, carbon dioxide, or other compounds.
The live microorganisms that complete this process are called probiotics. You have probably heard that word. And foods high in probiotics have long been associated with better gut health.
Your gut already has a lot –like, trillions – of microorganisms in it. (I know, yuck!) Part of good gut health is keeping the right balance of these microorganisms. I’m no expert, but my understanding of it is that, like in the movies, there are good guys, bad guys, and lesser characters. Fermented foods give you more heroes to work with while the microorganisms fight it out.
 You probably already eat some fermented foods. Soy sauce? Yup, fermented. Fish sauce? The same. Yogurt is a well-known one, as are kefir, kimchi, and kombucha. Sourdough bread is fermented, but the baking kills off the microbes in it. Vinegar, like wine, is fermented, and if you buy it raw and unfiltered it will also include the “mother” – which is the complex of microorganisms that caused the fermentation. Some cheeses are fermented. Olives are fermented also, but frequently they are sold pasteurized, which kills off the microorganisms before they reach you.
 When I was last in Barcelona, during the market tour I did we had the most amazing fermented olives. They were so flavorful, and unlike any olive I’ve ever eaten in the States.
If you are looking for fermented foods in the supermarket, make sure to look at the label. It should say that the product inside includes live cultures, or that it is naturally fermented. Also, if it also says it is pasteurized, there are likely no live bacteria left. Finally, fermented foods will be found in the refrigerated aisle of the grocery store. If you’re looking at pickles or sauerkraut on the shelf-stable aisles, they do not contain live cultures.
What are some of the other benefits of fermentation? Fermented foods last longer. People have used fermentation as a way to preserve foods since forever.
There are plenty of studies out there regarding the effects of fermented foods on health. In addition to gut health, some studies say that fermented foods can help with high blood pressure, bone marrow density, weight loss, the immune system, and more.
So now what? It’s time to try your hand at fermentation with these two easy recipes.
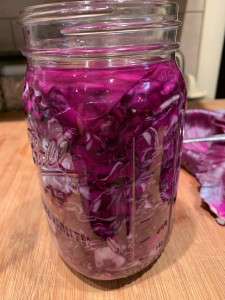 Homemade Sauerkraut
Serves: 10
Prep time: 20-30 minutes
Cook time: 0 minutes
Cook method: Ferment
 Ingredients:
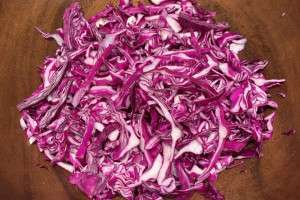
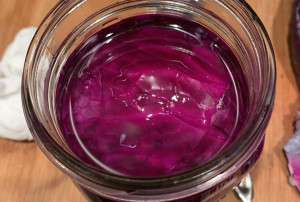 1. First, prep the cabbage. Take off a few of the large outer leaves and set them aside. Then, cut the rest of the cabbage. You can do it by hand, slicing it very finely, with a mandolin slicer (be careful of your fingers!), or with a food processor. If using this last, use the slicer tool, not the shredder tool. The shredder cuts the cabbage too fine.
2. Place the cabbage in a large bowl and sprinkle with 1 Tbsp sea salt. Toss the cabbage and set aside for 15 minutes or so, until the salt pulls the water from the cabbage and makes it all appear wet.
3. Using a wide mouthed quart jar or two pint jars, start packing the cabbage in. You will want to tamp it down tightly after each spoonful. You should pack it enough that the liquid from the cabbage squeezes out to cover it.
4. When you get about an inch from the top, stop. If there is not enough liquid to cover the cabbage, top it with a bit of filtered water. Then take one or two of the large cabbage leaves and place them on top, using the back end of a spoon to tuck them down into the jar. This will help keep the cabbage from floating. There should be nothing above the surface of the liquid. If there is, top it off with a bit more filtered water. You can also place a small, 4 ounce jar inside the mouth of the larger jar, and use it to keep the cabbage pressed down.
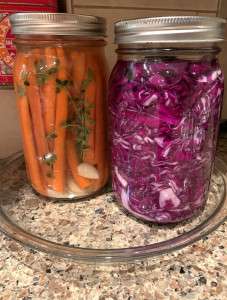 5. Put the lid on the jar, but without tightening it too much, and place out of direct sunlight on the counter. We recommend putting a dish under it, as frequently some of the liquid will bubble up and overflow during the fermentation.
6. Check it each day by taking the lid off. This lets the gasses escape and lets you see how things are progressing. Don’t be alarmed if it starts to bubble and smell sour. That is what happens with fermentation!
7. After 3-4 days, give it a taste test. To do this you will have to carefully push aside the top cabbage leaves with a fork or spoon (don’t use your fingers). If the sauerkraut tastes sour and to your liking, pop it in the fridge. If you’d like it a bit more sour, then leave it out longer, checking it each day. Remember, after tasting it make sure that all of the cabbage is back under the surface of the liquid.
I have never had a batch of fermented kraut go bad, but I have heard that if it grows mold, turns brown or gray, or develops a slimy texture, then you should throw it away. Duh!
 Fermented Carrots
Serves: 10
Prep time: 15 minutes
Cook time: 0 minutes
Cook method: Ferment
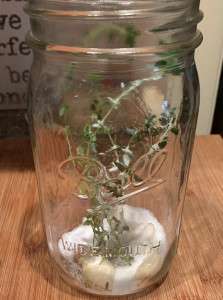 1. Smash the garlic cloves and clean and dry the herb sprig, then place both in the bottom of a wide-mouth quart jar (or two pint jars) with a tablespoon of sea salt.
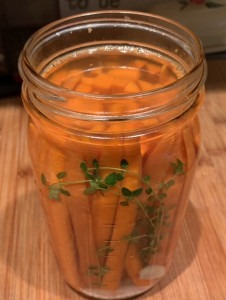
2. Prep the carrots. If the skins are thick or bitter, you can peel them, but I tend to leave the peel on if they are organic. Slice them lengthwise and thinly, exactly the length of the jar from the bottom to just under where it starts to curve toward the mouth. The thinner you cut them, the softer they will be when fermented. Also, try to cut them as uniformly as possible.
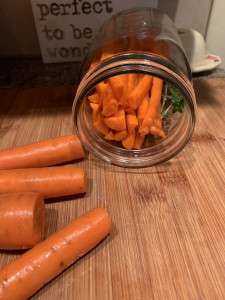 3. Place the carrots in the jar, packing them in tightly. If you pack them tightly enough, they won’t be able to float to the surface. I usually start by placing the jar on its side. Once there are enough in there to keep the carrots straight upright, I go in one by one, pushing them down to fill any empty spaces.
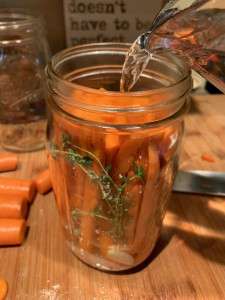 4. Carefully pour in enough filtered water to completely cover them. Put the lid on, but not tightly, then place out of the sun on a countertop. Place a dish underneath it to catch any leakage.
5. After 2-3 days, check the carrots. The liquid should have turned cloudy, and if you open the jar you will see some bubbling and frothiness. You can use a clean spoon to clear it off, but make sure the carrots remain submerged. You can taste the carrots at this point, but they will probably need at least a couple additional days.
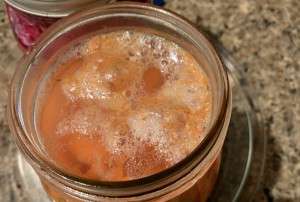 6. Once the carrots taste the way you like, put them in the refrigerator. They will continue to ferment, but much more slowly at colder temperatures.
By Peg Kern
Sign up to receive our newsletter, which includes travel tips, recipes, promotions, and information on our best cooking vacations.
Find more photos, videos, food facts, and travel stories from The International Kitchen on Facebook, YouTube, Instagram, Pinterest, and Twitter.